Acupressure for Headaches — A Beginner's Guide
Headaches are one of the most common reasons people try acupressure. The good news: a handful of easy-to-reach points on the face, head, hands, and neck are used again and again in Traditional Chinese Medicine for tension headaches, pressure around the eyes and sinuses, and general head discomfort.
Massage Map 3D lists 23 acupressure points for the ailment Headache (under Ailments → Head). This guide focuses on seven beginner-friendly points from that same list — good starting places before you explore the full set in 3D.
Seven starter points
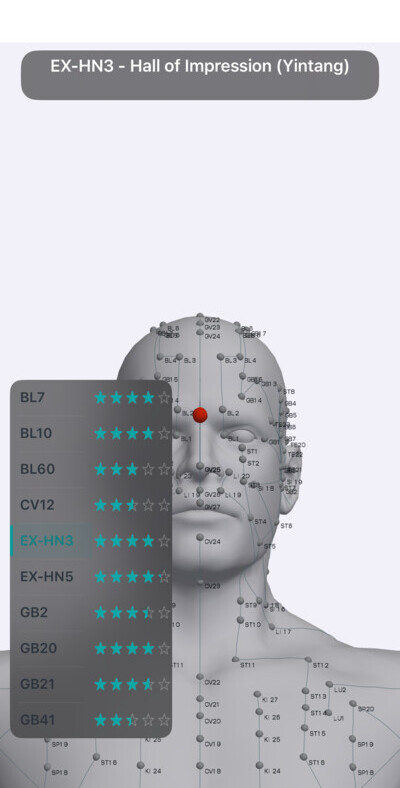
Location: Midway between the inner ends of the eyebrows, on the forehead.
Why it helps: Calming point often used for frontal pressure, sinus fullness, and stress-related headache. Easy to find and press discreetly.
Technique: Press gently with a fingertip or knuckle for 30–60 seconds while breathing slowly. Keep pressure moderate — this area can feel sensitive.
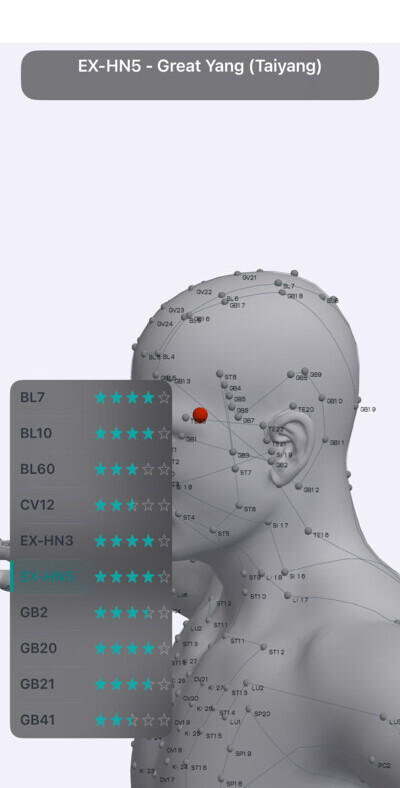
Location: In the soft hollow at the temple, about one finger-width behind the outer end of the eyebrow.
Why it helps: Classic point for temporal headaches and eye strain that wraps to the sides of the head.
Technique: Use both index or middle fingers; small circles for 1–2 minutes per side.
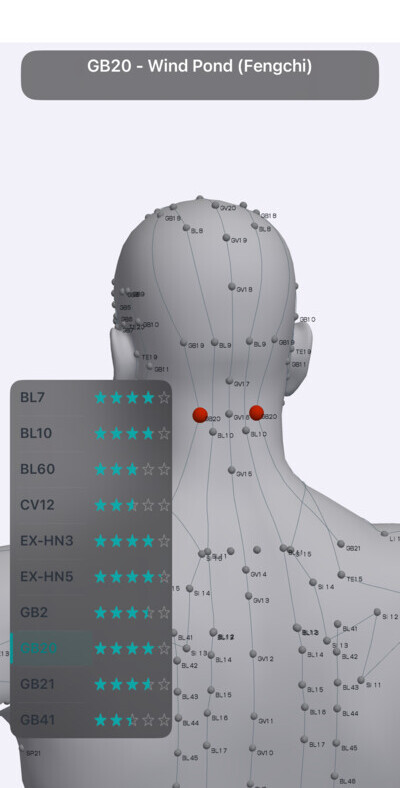
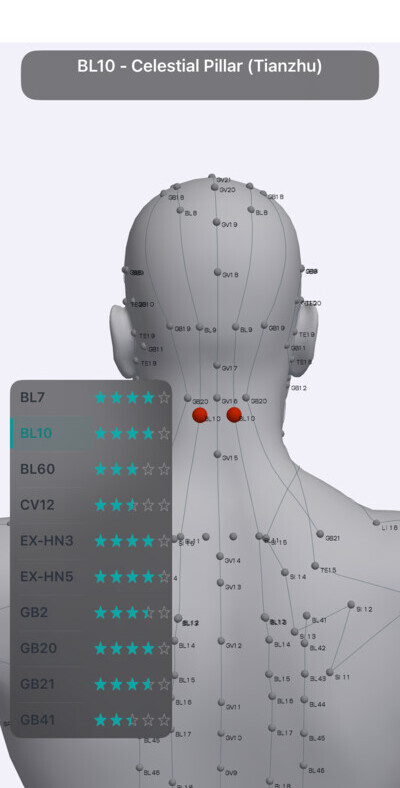
Location: Below the skull in the hollow between the two big neck muscles (sternocleidomastoid and trapezius), roughly level with the ear canal.
Why it helps: One of the best-known points for headache, neck tightness, and “wind” patterns in TCM. Often paired with neck stretches.
Technique: Thumb or fingers, firm steady pressure 30–90 seconds per side. Loosen shoulders while pressing.
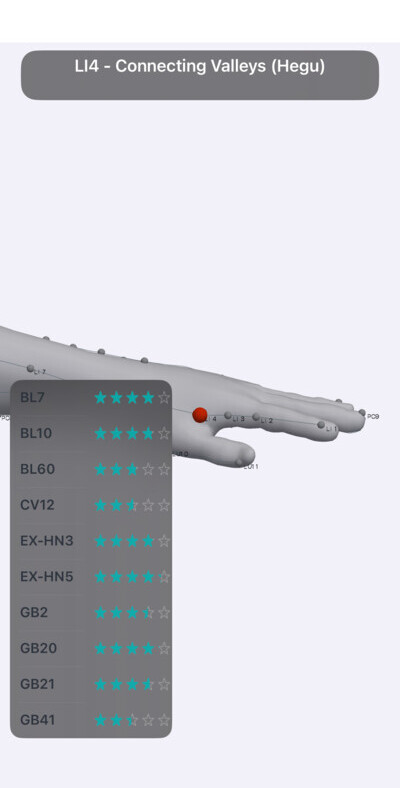
Location: On the back of the hand, in the fleshy mound between thumb and index finger bones.
Why it helps: Powerful distal point used for head and face pain, congestion, and general pain relief in TCM.
Technique: Squeeze the point with opposite thumb and index finger for 1 minute per side. Do not use during pregnancy except under professional guidance.
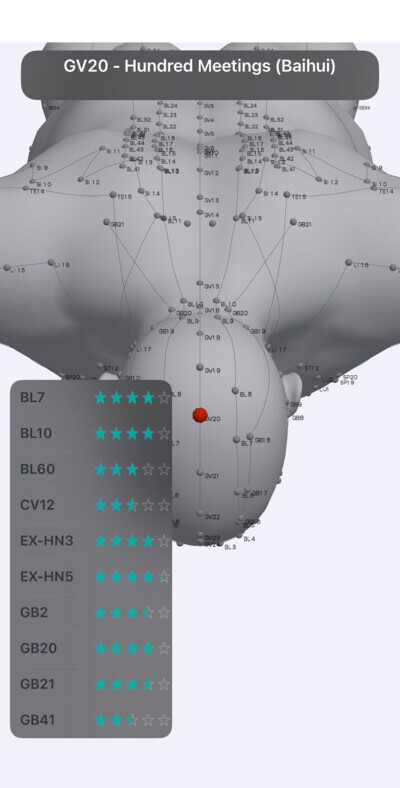
Location: Top of the head, along the midline, in the soft spot traditionally described as the “crown.”
Why it helps: Used for lifting “sinking” headache, dizziness, and mental fatigue; helps some people feel clearer.
Technique: Light circular massage with fingertips for 1–2 minutes — use gentle pressure only.
Location: On the upper neck, lateral to the midline, in the muscular groove at the hairline level (see in-app 3D for exact placement).
Why it helps: Excellent when headache comes with neck stiffness, screen time, or upper trapezius tension.
Technique: Hook thumbs or use a massage ball against a wall at shoulder level; 1–2 minutes.
Location: On the scalp, about 4 cun posterior to the front hairline and 1.5 cun lateral to the midline (use the app's 3D view to see the exact landmark).
Why it helps: Often used for frontal and vertex headache with sinus or nasal congestion.
Technique: Scalp points respond well to gentle circular friction with fingertips for 60–90 seconds per side.
Also in Massage Map 3D for Headache
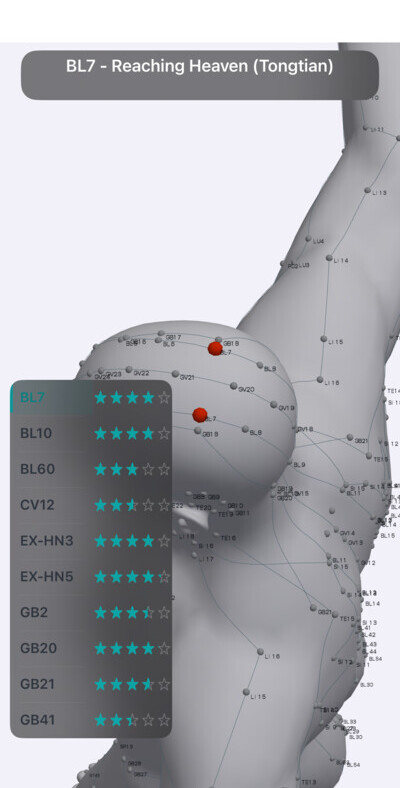
The app links 16 additional points to the same Headache ailment. When you're ready to go deeper, open the ailment in 3D and browse: BL60, CV12, GB2, GB21, GB41, GV16, GV19, GV21, LR2, LR3, SI19, SP4, ST2, ST36, TE16, and TE21.
Tips for beginners
- Start gentle — especially on face and scalp.
- Combine neck + hand points (e.g. GB20 + LI4) for many tension-type headaches.
- Use the 3D model to confirm placement — angles matter.
- Check community ratings in the app to see which points users found most useful for Headache.
See all 23 Headache points in 3D
Open Massage Map 3D → Ailments → Head → Headache. Rotate the model, read each point's full description, and log what works for you.

← Back to Kehaar Labs · Back pain guide · Acupressure vs acupuncture